
The Complete Guide to Solar Gable Wall Fan Sizing - Installation for Different Building Types
The Complete Guide to Solar Gable Wall Fan Sizing & Installation for Different Building Types
When it comes to improving indoor air quality, reducing moisture, and lowering cooling costs, few solutions match the efficiency and sustainability of a solar gable wall fan. Unlike traditional electric fans that add to your utility bills, a properly sized solar-powered ventilator uses free energy from the sun to extract stale, hot, or humid air from attics, basements, workshops, greenhouses, and even commercial warehouses.
But here’s the challenge that most building owners and contractors face: how do you determine the right size and configuration for your specific application? And once you’ve selected the fan, what’s the best way to install it for maximum performance?
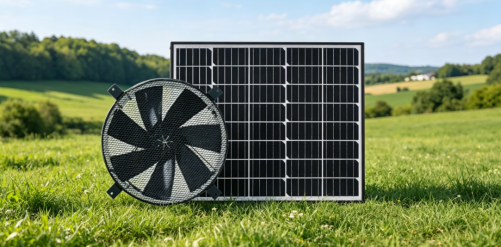
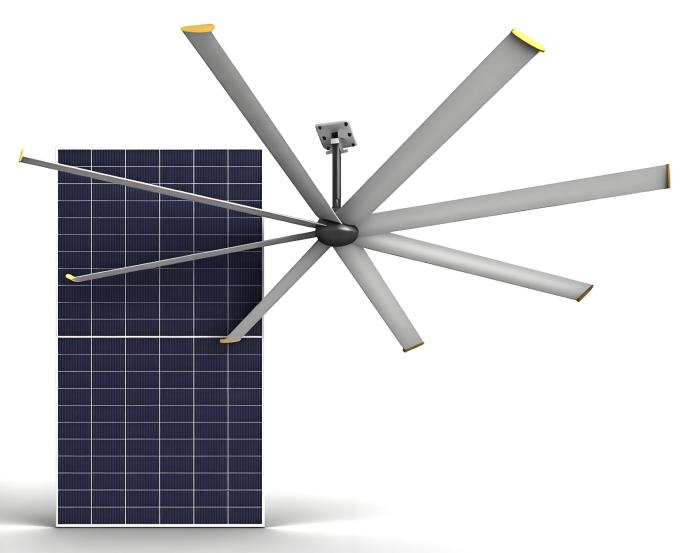
This guide walks you through a practical, room-by-room approach to sizing and installing SIPL’s solar gable wall fan — a versatile, IP68-rated ventilator available in 12‑inch and 14‑inch models, with optional battery or AC backup for 24/7 operation. By the end, you’ll know exactly which setup works for your attic, basement, greenhouse, or workshop, and how to install it without calling an electrician.
Why Solar Gable Wall Fans Are Gaining Popularity
Before diving into sizing and installation, it helps to understand why more property owners are switching to solar-powered ventilation. The reasons go beyond “green” credentials:
· Zero operating cost during sunny hours – The fan runs directly from the solar panel, consuming no grid electricity.
· Reduced HVAC load – By exhausting super‑heated air from attics or removing humidity from basements, air conditioners and dehumidifiers work less hard.
· Low maintenance – Brushless DC motors (BLDC) have no brushes to wear out, and the IP68 waterproof rating means the fan can be installed in exposed locations without fear of moisture damage.
· Flexible backup options – Add a solar battery or an AC/DC adapter to keep the fan running at night or on cloudy days.
· Smart controls – Optional remote controllers, smartphone apps, and thermostats let you automate operation based on temperature or humidity.
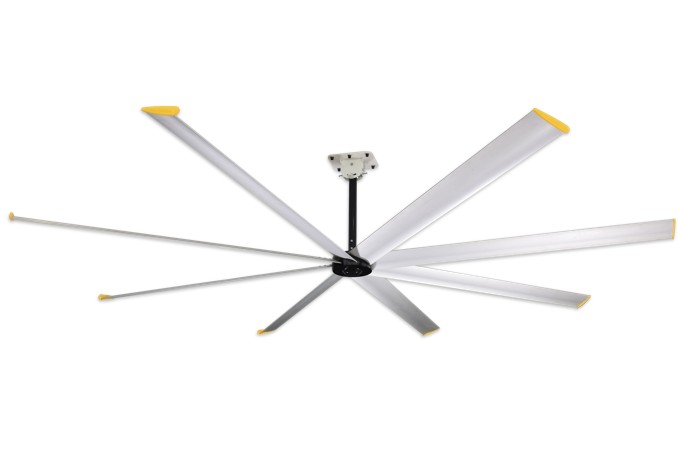
SIPL’s solar gable wall fan embodies all these benefits. Its 7‑blade nylon‑fiberglass design delivers high airflow with low noise (<45 dB), while the galvanized steel housing with anti‑rust, anti‑UV coating stands up to years of outdoor exposure. The motor alone is rated for over 10 years of service, backed by a 5‑year warranty.
Now, let’s match those capabilities to real‑world buildings.
Step 1: Understand the Core Specifications
SIPL offers two fan diameters: 12 inches and 14 inches. Each is paired with a monocrystalline solar panel ranging from 40W to 60W. For 24‑hour operation, you can add an AC/DC adapter or a lithium iron phosphate battery (16V, 9.6Ah). The battery‑backed configurations deliver similar airflow but run continuously through the night.
What these numbers mean in practice: A 14‑inch fan moving 2,000 CFM can completely exchange the air in a 1,500 sq ft attic every 5–6 minutes. That’s enough to drop attic temperatures by 20–30°F on a hot summer day, directly reducing the cooling load on your home’s HVAC system.
Step 2: Sizing the Fan for Your Application
The right fan size depends on three factors: the volume of the space (length × width × height), the desired air exchange rate, and the local climate (how many sunny hours you get).
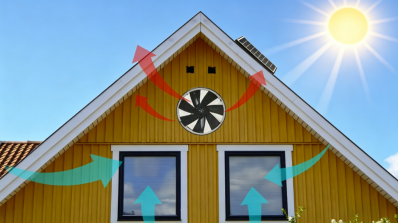
2.1 Attic Gable Ventilation
Attics are the most common application for a gable wall fan. During summer, attic temperatures can soar to 140–160°F, and that heat radiates down into living spaces, forcing air conditioners to work harder.
Sizing rule of thumb for attics:
For every 1,000 sq ft of attic floor area, you need roughly 1,000 CFM of ventilation.
· 1,200 sq ft attic → use a 12‑inch fan (1,503 CFM)
· 1,500–2,000 sq ft attic → use a 14‑inch fan (1,764–2,003 CFM)
· Large attics (>2,500 sq ft) → consider a custom combination of two 14‑inch fans powered by a larger solar array (SIPL offers 4‑in‑1 and 6‑in‑1 frames).
Installation tip: Mount the fan on the gable wall opposite the primary air intake (e.g., soffit vents or a second gable vent). This creates cross‑ventilation that pulls cool outside air through the attic, pushing hot air out.
2.2 Basement / Garage Air Exchange
Basements tend to be damp and poorly ventilated, leading to musty odors, mold growth, and increased humidity that can damage stored items. A solar gable wall fan can exhaust this stale air, drawing in drier outside air through existing vents or cracks.
Sizing for basements:
Aim for 6–8 air changes per hour (ACH) for a basement or garage.
· Small basement (<500 sq ft, 8‑ft ceiling) → 12‑inch fan is plenty (1,503 CFM delivers ~13 ACH)
· Large basement (1,000 sq ft) → 14‑inch fan (1,764 CFM gives ~10 ACH)
Because basements often have limited sunlight, consider the 24‑hour backup option (solar battery or AC adapter) so the fan continues to run after sunset. The smart controller automatically switches between solar and backup power, giving priority to free solar energy whenever available.
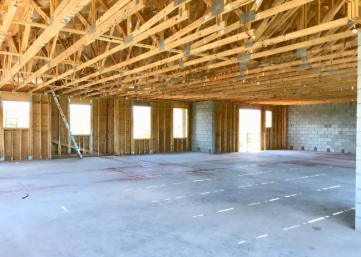
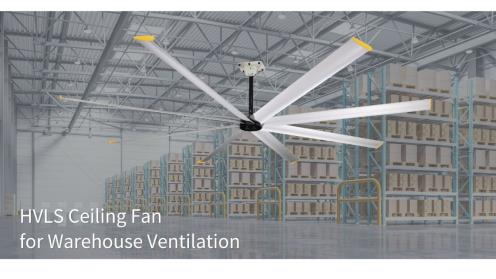
2.3 Workshop / Warehouse Air Exhaust
Workshops accumulate dust, fumes from paints or solvents, and heat from tools and machinery. Warehouses face similar challenges on a larger scale. Solar ventilation here improves worker comfort and safety while keeping operating costs near zero.
Sizing for workshops/warehouses:
Target 10–15 ACH for workshops; warehouses can use 4–6 ACH if only heat and mild fumes are concerns.
· Small workshop (400 sq ft) → 12‑inch fan
· Medium workshop (800 sq ft) → 14‑inch fan (2,003 CFM)
· Large warehouse (5,000 sq ft, 12‑ft ceiling → 60,000 cu ft) → Single 14‑inch fan provides only ~2 ACH, which is insufficient. For warehouses, combine multiple fans using SIPL’s square mounting frames (e.g., a 4‑in‑1 array of 14‑inch fans delivers ~8,000 CFM, raising ACH to 8). Or use a single large solar panel to power several separately mounted fans.
Pro tip: In dusty environments, add the optional protective fan guard on the rear side to prevent debris from damaging the blades or motor.

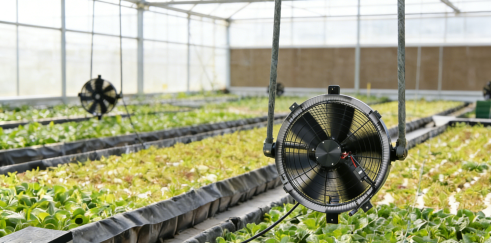
2.4 Greenhouse / Poultry Farm Air Circulation
For greenhouses and livestock buildings, consistent airflow is critical for temperature regulation, humidity control, and disease prevention. Solar fans are ideal because they operate during the hottest, sunniest parts of the day when ventilation is most needed.
Sizing for greenhouses:
A general rule is 1 CFM per square foot of greenhouse floor area.
· 500 sq ft greenhouse → 12‑inch fan (1,503 CFM)
· 1,000 sq ft greenhouse → 14‑inch fan (1,764–2,003 CFM)
For poultry farms, place the fan at one end of the building and open inlets at the opposite end to create a tunnel‑ventilation effect. Use the adjustable thermostat with bypass switch (0–50°C range) to automate the fan based on indoor temperature, with a manual override when needed.
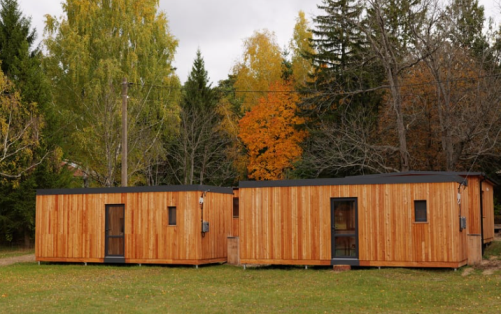
2.5 Prefab House / Log Cabin Home Ventilation
Tiny homes, prefab houses, and log cabins often lack dedicated HVAC systems. A solar gable wall fan provides simple, off‑grid‑friendly ventilation that removes cooking odors, smoke, and excess humidity.
Sizing:
Most small homes under 800 sq ft work well with a 12‑inch fan. If the home is in a hot climate or has a loft area that traps heat, upgrade to the 14‑inch model.
Because these homes may be off‑grid, the solar battery backup is especially valuable — it keeps the fan running at night without drawing from limited battery banks used for lights and appliances.
Step 3: Installation Walkthrough (No Electrician Required)
One of the biggest advantages of SIPL’s solar gable wall fan is that it comes fully assembled with plug‑and‑play connectors. For the basic solar‑only setup, you don’t need an electrician. Here’s how to install it in six steps.
Tools You’ll Need
· Drill / jigsaw (for cutting the mounting hole, if not pre‑existing)
· Screwdriver
· Level
· Measuring tape
· Caulking gun (for weather sealant)
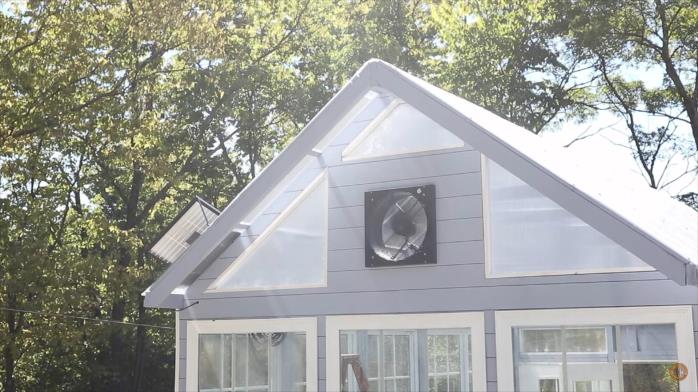
Step 3.1 – Choose the Mounting Location
For gable wall installation: pick a spot on the exterior gable wall that receives direct sunlight for most of the day (south‑facing in the Northern Hemisphere). The fan itself can be installed on any wall, but the solar panel must be in an unobstructed sunny location. The included 10‑meter cable gives you flexibility to place the panel up to 33 feet away.
Step 3.2 – Cut or Prepare the Opening
If an existing vent opening is available, use it. Otherwise, mark a square or circular hole matching the fan’s dimensions:
· 12‑inch fan: 317mm (12.5″) diameter or 317mm × 175mm rectangular
· 14‑inch fan: 368mm (14.5″) diameter or 368mm × 175mm rectangular
Use a jigsaw to cut through the wall sheathing. For masonry walls, a core drill may be needed.
Step 3.3 – Mount the Fan Housing
Slide the fan into the opening. The housing comes with 4 slidable mounting brackets that adjust to fit different wall thicknesses. Secure the brackets with screws. Apply weather‑resistant caulk around the flange to prevent water infiltration.
Step 3.4 – Install the Solar Panel
Mount the monocrystalline solar panel using its adjustable base. The bracket allows you to tilt the panel for optimal sun exposure (typically at an angle equal to your latitude). Secure the panel to a roof, wall, or ground‑mounted post. Ensure the panel is stable and not shaded by trees or overhangs.
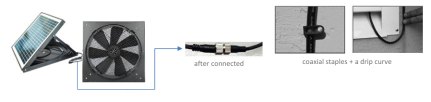
Step 3.5 – Connect the Cables
Plug the 10‑meter cable from the solar panel into the fan’s waterproof connector. The connectors are keyed, so you can’t reverse polarity. For backup systems:
· AC/DC adapter: Plug the adapter into a standard outlet (100–240V), then connect its DC output to the fan’s backup port.
· Solar battery: Connect the battery between the solar panel and the fan according to the included diagram. The smart controller handles automatic switching.
Step 3.6 – Test and Adjust
On a sunny day, cover the solar panel with a cloth, then uncover it. The fan should start within a few seconds. If you installed a thermostat or remote control, test each setting. For the “Smart Life” app control, download the app, pair the fan, and verify that you can adjust speed, set timers, and view temperature/humidity readings.
Step 4: Maintenance and Longevity
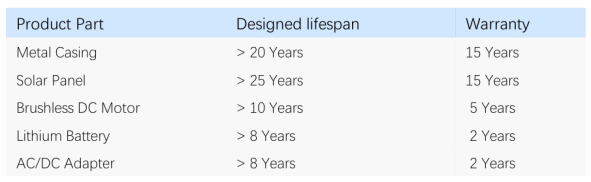
One of the selling points of SIPL’s solar gable wall fan is its low maintenance design. Here’s what you need to do to ensure it reaches its designed lifespan (20+ years for the casing, 10+ years for the motor, 25+ years for the solar panel):
· Clean the solar panel every 3–6 months with a soft cloth and mild soap. Dust and bird droppings can reduce output by 15–25%.
· Inspect the fan guard annually for debris (leaves, nests). Clear any blockages.
· Check the cable connections for corrosion, especially in coastal areas. The IP68 connectors are waterproof, but it’s good practice to verify.
· For battery systems: LiFePO₄ batteries have a cycle life of 3,000 charges. With daily cycling, that’s over 8 years. Store the battery in a dry location between -20°C and 60°C.
The warranty covers the motor for 5 years, the metal casing and solar panel for 15 years, and the battery/adapter for 2 years. For most users, the fan will operate trouble‑free for well over a decade with minimal intervention.
Final Thoughts: Matching the Right Fan to Your Building
Selecting and installing a solar gable wall fan doesn’t have to be complicated. By following the sizing guidelines above — matching cubic footage to CFM, choosing backup options based on your sunlight hours, and leveraging smart controls for automation — you can dramatically improve indoor air quality and reduce energy costs without a single monthly electricity bill for ventilation.
SIPL’s 12‑inch and 14‑inch models cover the vast majority of residential and light commercial applications. For larger spaces, the ability to combine multiple fans using square mounting frames or power several fans from one big solar panel makes this product line scalable from a tiny cabin to a 10,000 sq ft warehouse.
If you’re still unsure which configuration is right for your project, SIPL’s in‑house R&D team offers free sizing consultations. Provide them with your building dimensions, usage type, and local climate, and we’ll recommend the optimal setup — whether that’s a single unit or a custom fan array.

-
Q-A Solar Gable Wall Fans – The Ultimate Ventilation Solution for Every Space
As more people turn to solar-powered ventilation for its cost savings, sustainability, and reliability, the Solar Gable Wall Fan has emerged as a game-changer.
넶0 2026-04-12 -
-

The Complete Guide to Solar Gable Wall Fan Sizing - Installation for Different Building Types
Unlike traditional electric fans that add to your utility bills, a properly sized solar-powered ventilator uses free energy from the sun to extract stale, hot, or humid air from attics, basements, workshops, greenhouses, and even commercial warehouses.
넶0 2026-04-11 -
-
Beyond the Breeze 6 Hidden Reasons Your Big Space Needs a Solar HVLS Fan
You’ve tried cranking the AC. You’ve added more fans. But the real solution isn’t louder or harder—it’s smarter. And it runs on sunlight.
Meet the SIPL Solar HVLS Ceiling Fan. Not just a fan, but a silent, solar-powered revolution for large spaces—from warehouses to restaurants, barns to gyms. Here’s why installing one might be the smartest move you make this year.넶0 2026-04-08 -


